How to backup your data in LINUX OS using Clonezilla?
Bare metal backup of your system is the biggest headache to system engineers. But Clonezilla is backup software which is based on udpcast, ntfasclone, Partition Image, and DRBL which makes the bare metal backup job very easy to its users. We have two types of version available for Clonezilla, Clonezilla live is used for single system backup and Clonezilla Server for multi-system backup. One of the outstanding feature of Clonezilla is that it restores and saves only used blocks in hard drive. Due to this efficiency of this software is good.
System Requirements for Clonezilla
- OS supported: All version of LINUX, WINDOWS XP, VISTA, 2000 Server, 2003 Server
- IBM Compatible Computer with processor speed greater than 1000 MHz.
- Hard Drive Space of 20 MB.
- RAM: 64 MB
Features of Clonezilla
- Available for Free.
- Supports jfs, xfs, reiserfs, ext3, ext2 file system for LINUX and NTFS, FAT for windows.
- Multicast function is available in Server edition.
- Contains program using which we can save the whole disk and not just the partition.
Taking the Backup Using Clonezilla
At first you have to start the Clonezilla using sbin/dch. The Clonezilla starting process is shown in Fig.1 below.
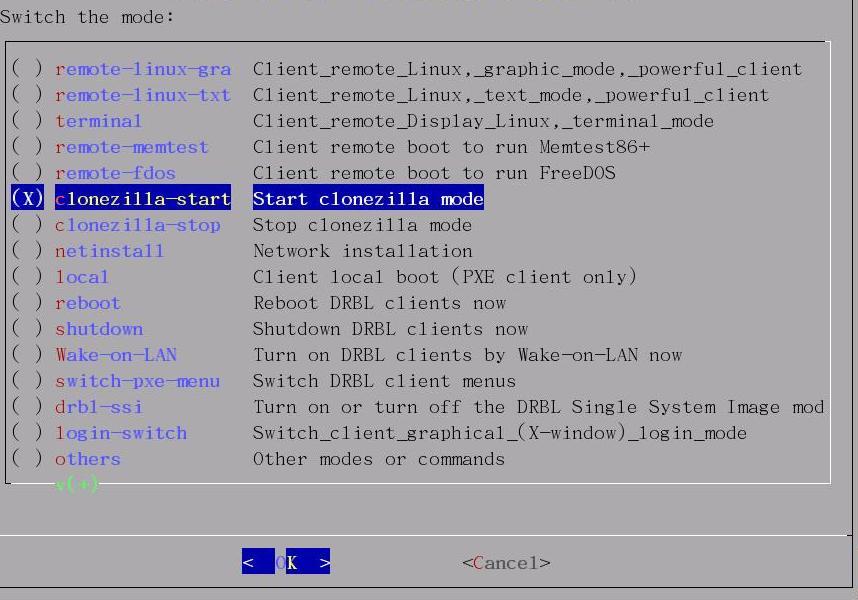
Figure.1 Starting Clonezilla
After Clonezilla is started you have to select the mode of Clonezilla. There in all four modes available in Clonezilla. All the four modes are shown in Fig.2 below. From the available modes you have to select the first mode.
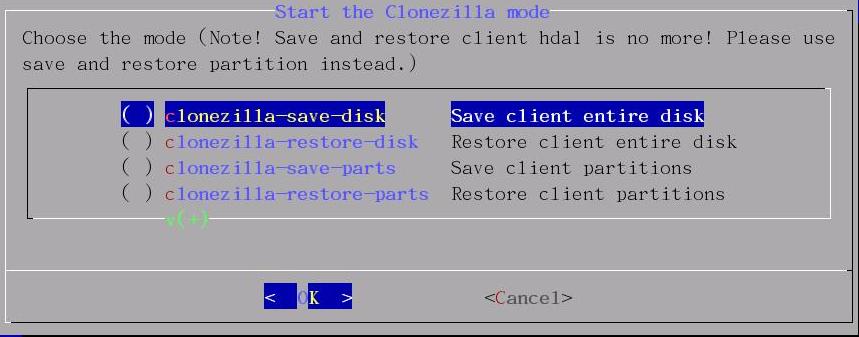
Figure.2 Modes Available in Clonezilla
In next window you have to select the keyboard for configuring, the description of each key map is available in window and in all there are four option available. From the four options available you have to select the second option. The window is shown in Fig.3 below.
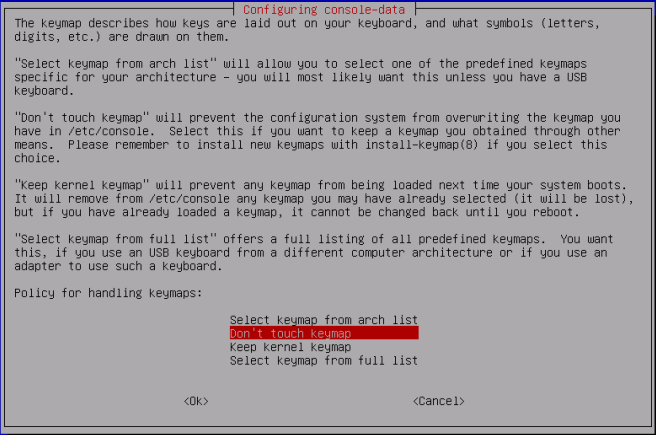
Figure.3 Keyboard Selection
After you select the key map then you have to enter the shell command as shown in window shown in Fig.4 below.
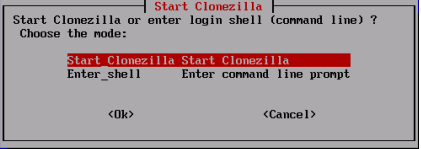
Figure.4 Entering the Shell Command
In the shell command you have to select the clone method. There are two clone method available. We have to select first option if we want a image file of the partition and if we want directly the copy of the partition then select the second mode. The window is shown in Fig.5 below.
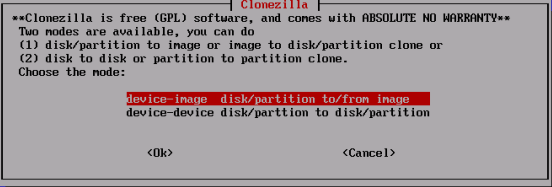
Figure.5 Selection of Clone Method
In the next window we have to select the home directory where the image file or the copy created should be stored. Here I had used my own device so used the local directory. All the available options are shown in Fig.6 below.
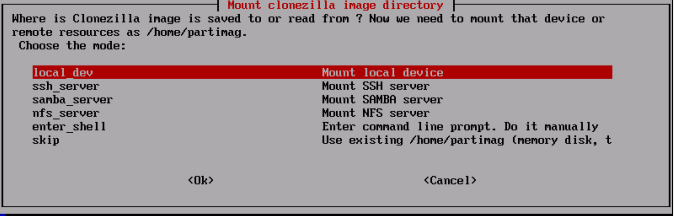
Figure.6 Setting the Home Directory
An image file of your selected partition will be created at the directory selected. For restoring the backed up file you just have to select the Clonezilla-restore-disk option available in window shown in Fig.1.
This is the process using which you can backup your important data of your system using Clonezilla.