How to take the data backup using IBM Tivoli Continuous Data Protection?
IBM Tivoli Continuous Data Protection is the real time safety software provided to us by IBM. This software takes continuous backup of our systems, and it is quiet beneficial for small business and for Computer users. As continuous saving is done of our modified data our data is free of accidental deletion, corruption, and viruses. This software is specially made for individual PC users, retail shops, medical offices, home based small business.
System Requirements for IBM Tivoli Continuous Data Protection
- IBM or PENTIUM Compatible PC with processor speed greater than 1000 MHz.
- RAM: 64 MB
- Hard Drive Space: 50 MB
- Internet Explorer 5.0 and further version
Taking the Backup using IBM Tivoli Continuous Data Protection
In the opening window you have to click on the My Files option, in the drop down box you have to select the Settings option. Setting option must be selected one which is red in color. The opening window is shown in Fig.1 below.

Figure.1 Opening Window
After you select the settings option you the backup operation set wizard will start. The relevant operation you are performing in the window will be shown to you on left side and will be marked with an arrow. The Backup operation set wizard is shown in Fig.2 below.
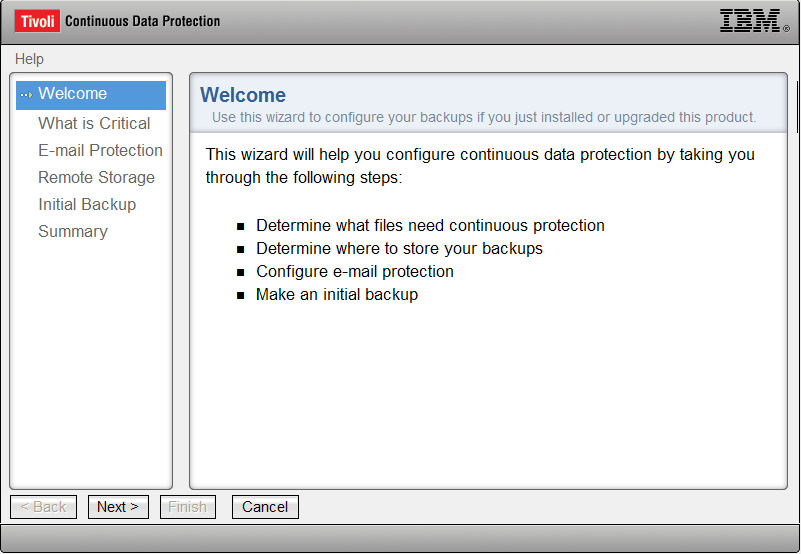
Figure.2 Backup Operation Set Wizard
After you click Next in the window you will be shown the extensions of files which are critical. The critical extension window is shown in Fig.3 below.
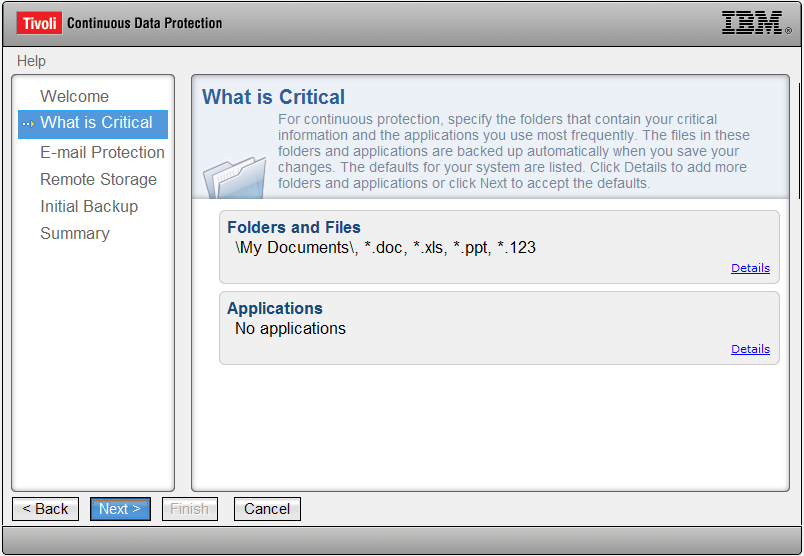
Figure.3 Critical Extension Window
In the next window you will be given the option of Email protection. In this wizard you can also backup you emails in the email clients you are using. You can also schedule the backup. The Email protection wizard is shown in Fig.4 below.
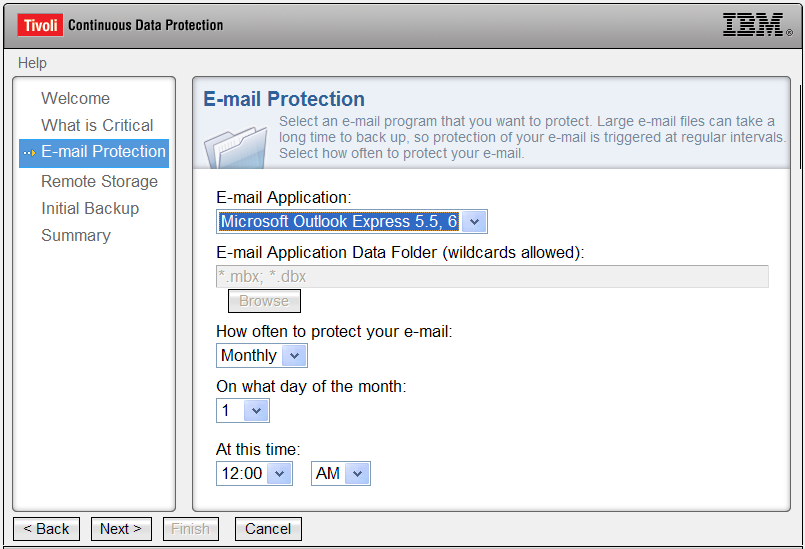
Figure.4 Email Protection Wizard
In the next window you have to set the path for storing the backed up files. There is a drop down list of option available. You can also set the space for backing up the files. The remote storage selection window is shown in Fig.5 below.
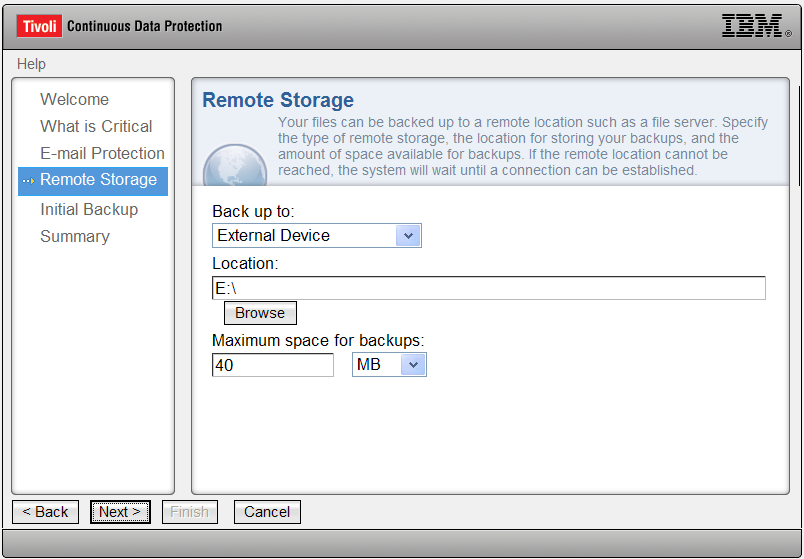
Figure.5 Selection of Remote Storage Devices
In the next window you will be asked if you want to run the backup task now or later. Select the option as per your requirement and click Next. The initial backup selection window is shown in Fig.6 below. After you click next command button in the next window you will be shown the summary of your backup process and clicking the Finish command button will save your settings and now the software is ready to take the backup as per your settings.
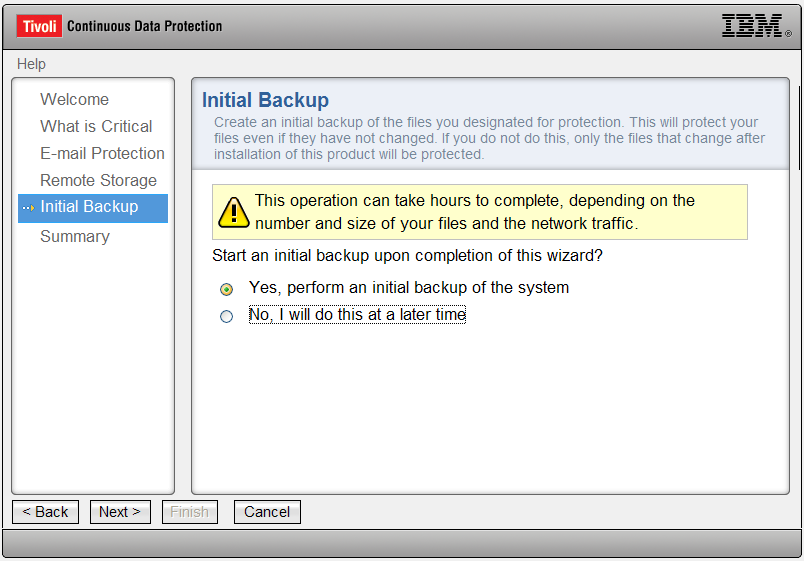
Figure.6 Initial Backup Selection Window
For restoring the files you have to select the Restore option shown in Fig.1. After you select the option the Restore wizard will start. The restore wizard is as shown in Fig.7 below.
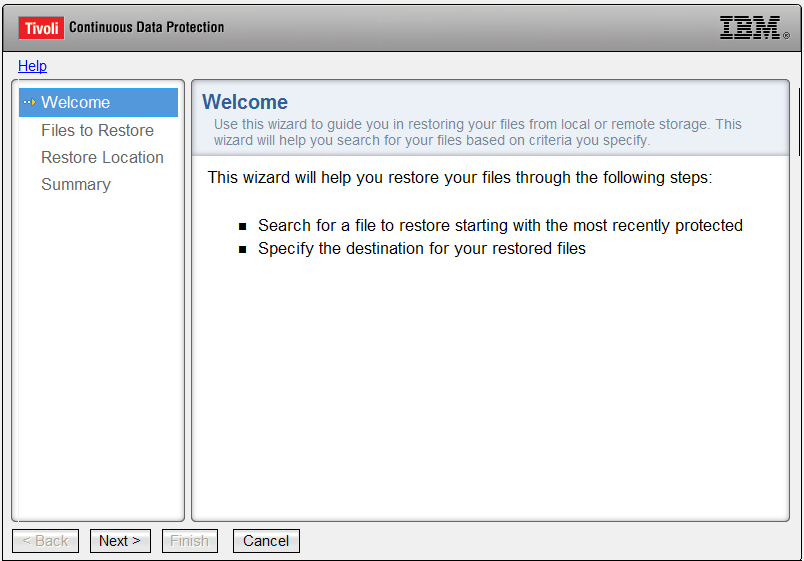
Figure.7 Restore Wizard
In the next window you have to select the files you want to backup. The selection is done by just checking the check boxes provided. The file selection wizard is shown in Fig.8 below.
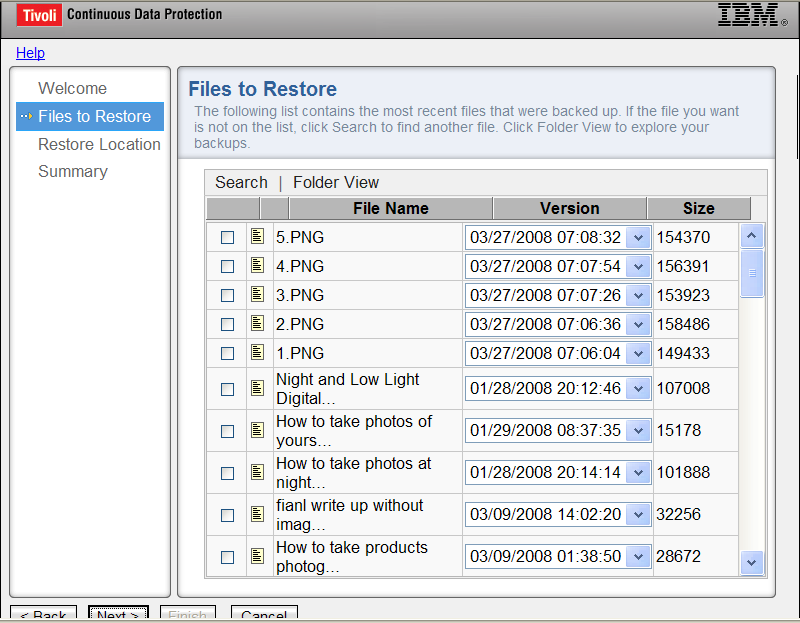
Figure.8 Restore Files Selection Wizard
In the next window you have to select the location for restoring the files. The restore location selection window is shown in Fig.9 below. After the location is selected in the next window you will be shown the summary of the whole process. Clicking the Finish command button will restore all the files.
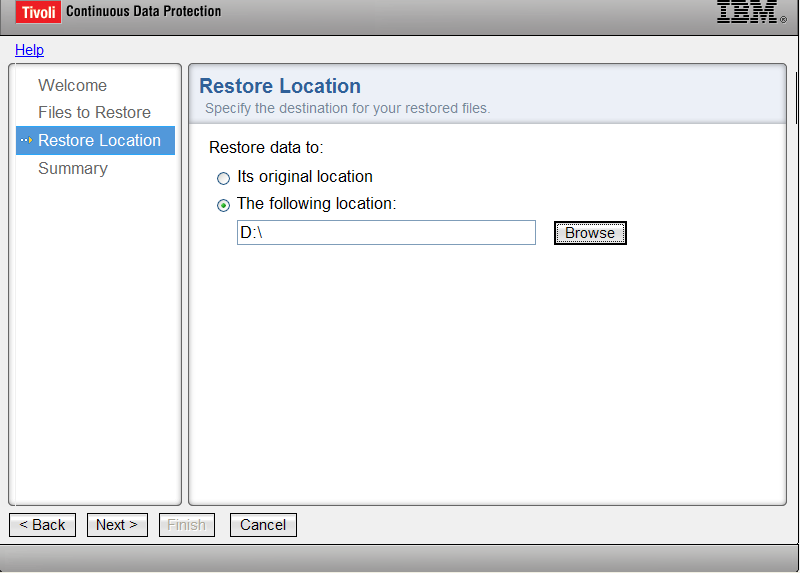
Figure.9 Restore Location Selection Window
IBM Tivoli Continuous Data Protection has provided us with a very user friendly interface. So users will find it quiet easy to use.