How to backup your data using Xdrive Desktop Online Backup?
Using Xdrive Desktop you can backup 5 GB of data. The can be of any type ranging from videos, music, images, etc. When you use this software you get the feeling that you are using an external hard drive with your computer. The more internet speed you have the quicker is your backup process. You can just drag and drop your files to the drive you have selected on this software. Authentication is done by AOL/AIM services, performance tuning is provided for faster download, the interface provided is very easy.
System Requirements for Xdrive Desktop
As this is an online backup service it just has two requirements;
- Internet Explorer 5.0 and further edition.
- Broadband Internet connection with speed 512 KBPS ( For better Performance 1 MBPS)
Taking the Backup Using Xdrive Desktop
At first you have to down load the Xdrive Desktop client from the link provided, and then you have to create an account at the Xdrive Desktop server for 5 GB data. When you download the client then you have to first connect to the Xdrive server by signing up as shown in Fig.1 below.

Figure.1 Sign in Window
In the next window you have to click the Advanced command button for creating a backup process. The selection option is shown in Fig.2 below.
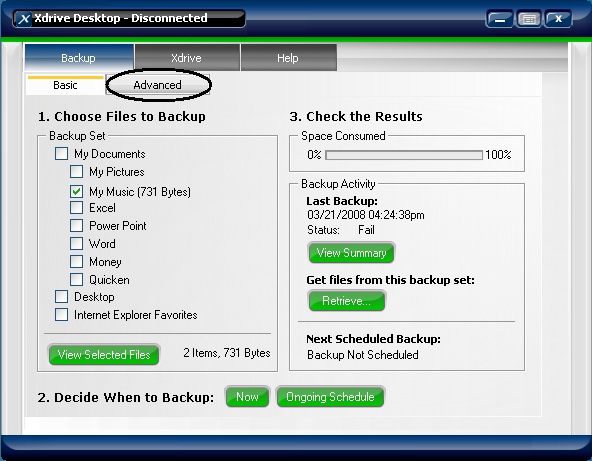
Figure.2 Selecting the Advanced Option
When the advanced option is opened click the New command button. When you click the New command button the Backup Set Creation wizard is opened as shown in Fig.3 below.
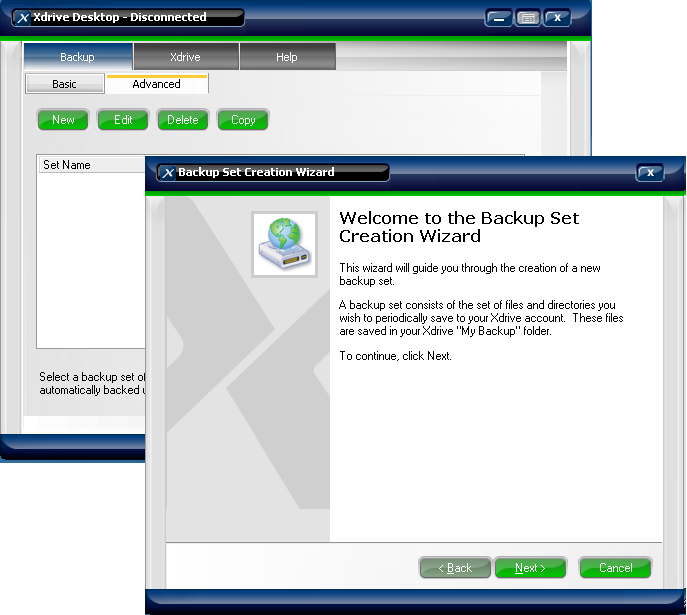
Figure.3 Backup Set Creation Wizard
When you click the Next command button in the wizard in the next window you have to name the Backup set. The window is shown in Fig.4 below.
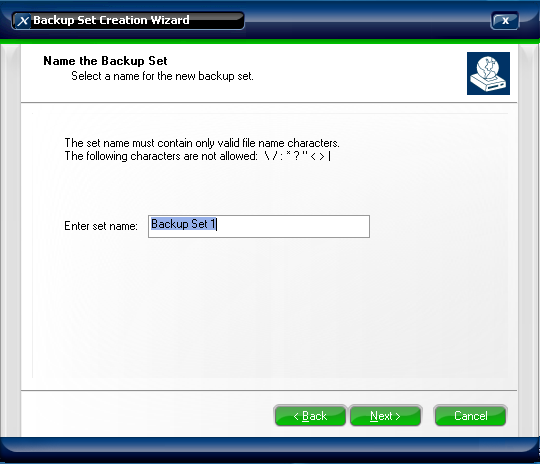
Figure.4 Naming the Backup Set
When you name the backup set and click the Next command button then come the files and folder selection. You have to do the selection by checking the check box provided. And then click the Next command button. The window is shown in Fig.5 below.
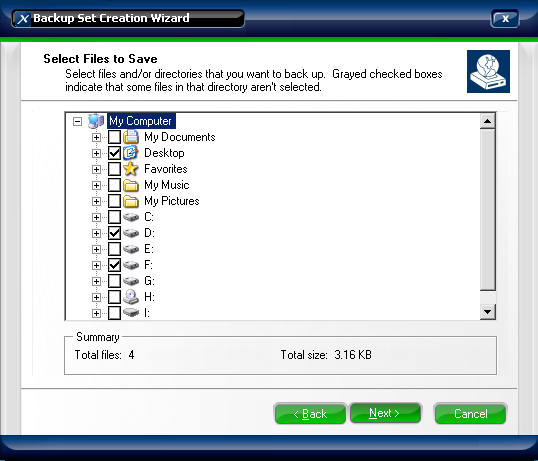
Figure.5 Selection of the Files and Folders
In the next window you have to insert the options as per your requirement. You also have to input the user name and password. And click the secure connection check box at the bottom. The window is shown in Fig.6 below.
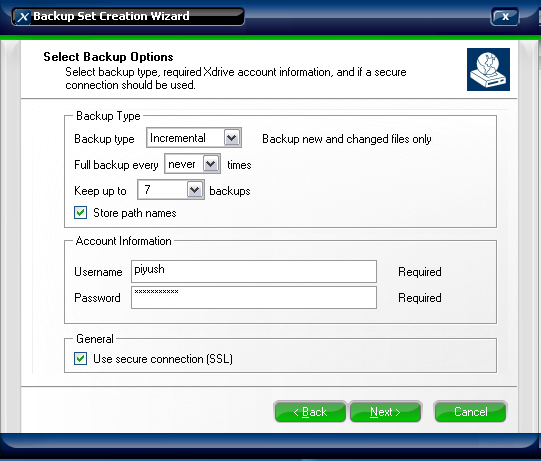
Figure.6 Option Insert Window
In the next window you have to schedule your backup by selecting the day and time as when you have to backup the selected files and folders. The window is shown in Fig.7 below.
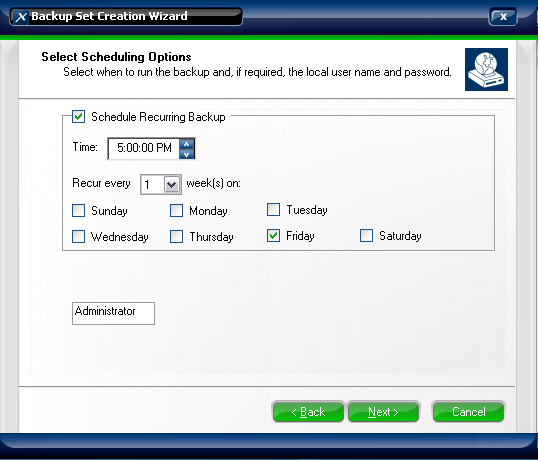
Figure.7 Scheduling Window
Then you will see the set of the files and folders selected you just have to select the list and click the backup now command button. Whole data will be backed up to the Xdrive Desktop server. Window is shown in Fig.8 below.
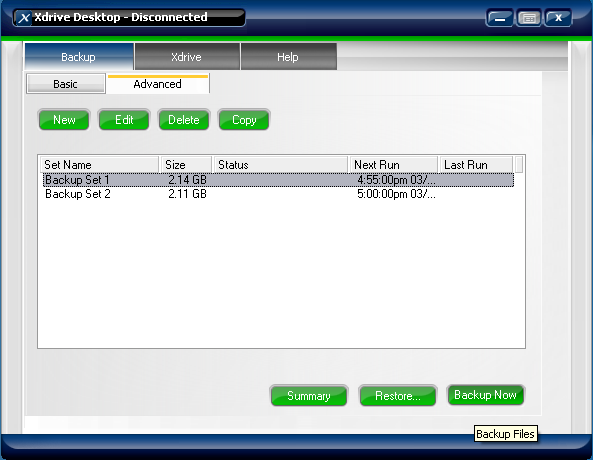
Figure.8 Executing the Backup Process
For restoring the data you have to just select the list you have to backup and click the restore command button all your files and folders in the list get restored to the original location.
You can see that just one time you have to set this process and then just relax and don’t worry about your data, Xdrive Desktop server is there to take care of it.