How to backup your Windows Mobile data using PIM Backup?
In our Windows mobile too there are system crashes. So the most important thing is to save our mobile data such as contacts, SMS, etc. PIM Backup allows us to backup all our mobile data like SMS and contacts. The previous version of this software was PPC Pim Backup, using which we were able to only backup the personal information of user. But PIM Backup comes with added features which are user friendly and advance too.
Backing Up Your Data
Open the PIM Backup software window in your windows mobile. In Action select the Backup option. Below the Action menu shown is the list of system data. Select the wanted data you want to backup. Shown in Fig.1;
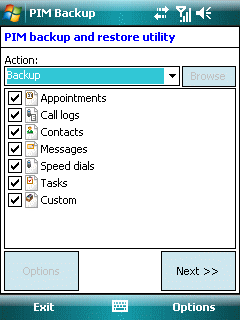
Figure 1. Opening Window
As you click Next you have to select the accounts and folders you have to backup. The selection can be done by just checking the check boxes provided to you. Shown in Fig.2;
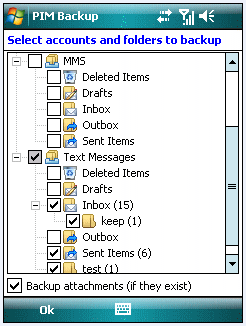
Figure 2.Selection of Accounts and Folders
In the next window you have to select the folders, types or files to backup. The folders, types or files to backup selection procedure are same that you use in your PC i.e. you have to browse through the folders and select them. Shown in Fig.3;

Figure.3 Files, Types or Folders to Select
Here you have to name the backup file. You can name the file by giving the current date. Shown in Fig.4;
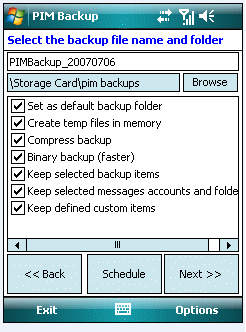
Figure.4 Naming the Backup File
You can also apply schedule to your backup process using the PIM Backup Schedule window. The window is shown in Fig.5;
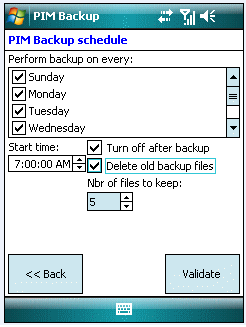
Figure5. PIM Backup Schedule
Priority can also be allotted to the process. The path for applying priority is as shown in Fig.6 below;
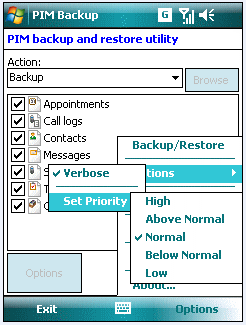
Figure.6 Setting the Priority
Now you delete all the data as shown in tasks, speed dials, contacts, call logs, appointments as shown in the screen shot below in Fig.7;

Figure.7 Deleting the Data
Go to Schedule option as shown in Fig.8 and select there Load Schedule;
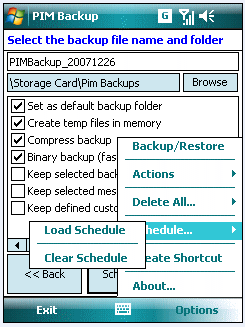
Figure.8 Loading the Created Schedule
The backup process will start and you can see the progress bar as shown in Fig.9;
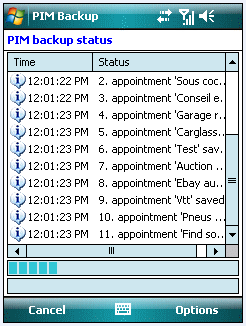
Figure.9 Backup Progress Bar
For restoring the files select the Restore option in the opening window and click Next all the backup files are unzipped and the progress bar is shown to you as in Fig.10;
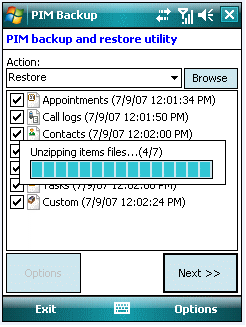
Figure.10 restore Option Selection
As soon as the unzipping of the file is over, you have to map the relevant data to the relevant folders as shown in Fig.11;
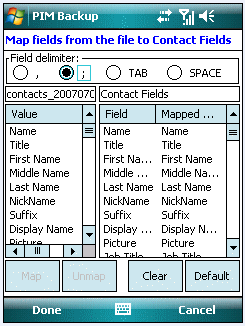
Figure.11 Mapping the Relevant Data
In the next window you have to select the accounts and folders to be restored by checking the check box. As shown in Fig.12;

Figure.12 Selecting the Folders and Accounts to be restored
After you select the accounts and folders then you have to select the Files and Folders to be restored as shown in Fig. 13;
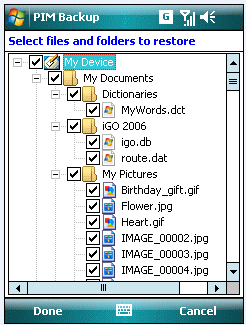
Figure.13 Selecting The File And Folder to Restore
After you click Done the restore process will startand all the files get restore to the destinations mapped by you.
Using PIM Backup you can backup your windows mobile data safely and without any loss.