How to take backup of disc partition using Acronis Disk Director?
Taking the back up of whole disc partition using Windows is very tedious and time consuming job. You will think “Hope there was software which could do this job just within few clicks.” Acronis Disk Director is the software which not only helps you in taking the back up of your disc partitions but you can also create, resize the partition. Creation of multiple boot environments is also possible using this software. The partitions can also be moved just like the cut paste procedure involved in windows. All this applications are done just in some few clicks using Acronis Disk Director.
System Requirements
- Computer which is PC compatible having Pentium (Similar processor) CPU
- RAM 128MB
- CD-RW Drive
- Mouse
- Operating Systems Supported: WIN NT 4.0 Service Pack 6, WIN 2000 PROF Service pack 4, WIN XP Service Pack 2, WIN VISTA
Procedure of taking the backup
Follow the few simple steps to copy your partition using Acronic Disk Director.
Step 1
For taking the partition backup, select the partition whose backup is to be taken then click on the Copy Partition (Encircled black) wizard on left hand side process shown in Image 1.
After the copy partition wizard is opened, select the partition and click on Next to copy of your partition (Refer Image 1).
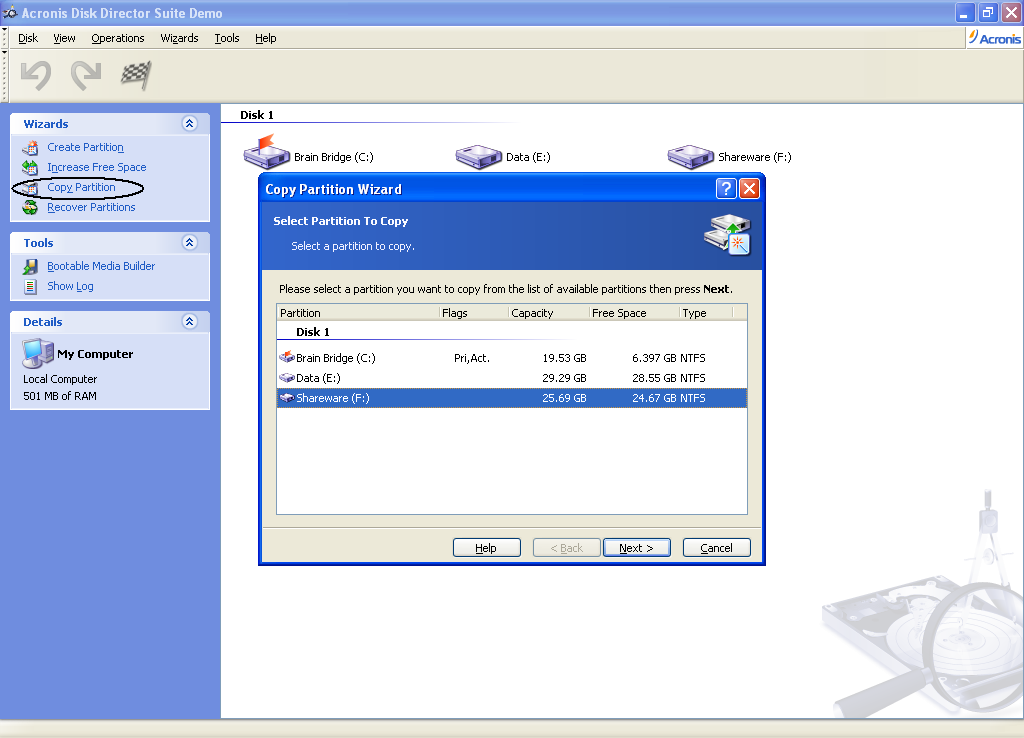
Image 1- Opening and selection of the backup/Copy Partition Wizard
Step 2
In the next window you will have to select the location after which you have to paste the copy of the partition this can be done by clicking on the partition after which you have to place the copy or by the arrow keys on the keyboard then you click Next process shown in Image 2;
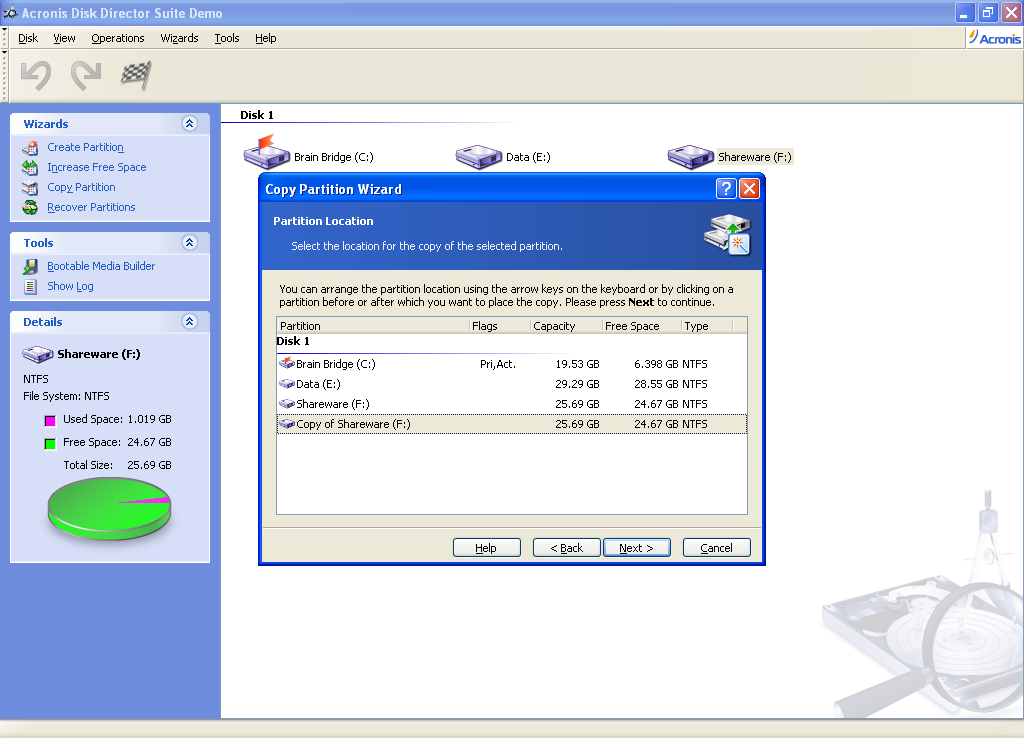
Image 2 - Copy Location Selection
Step 3
Then you have to select the free space from any of the partition so that the Copy of Your partition will use that free space then click Next as shown in Image 3.
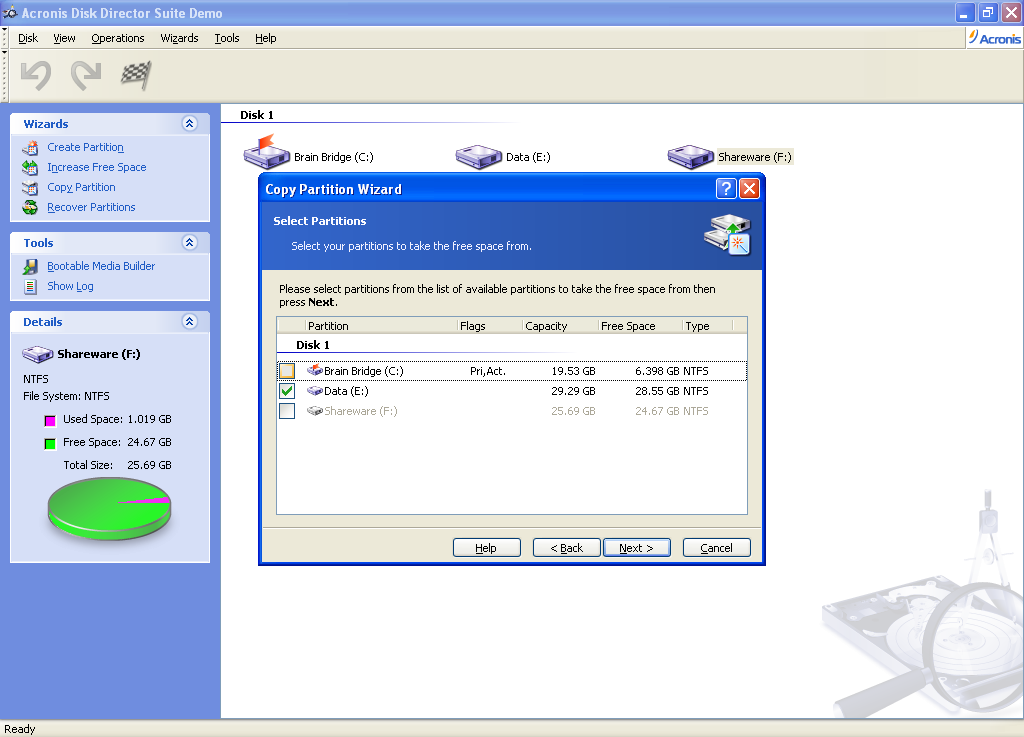
Image 3: Allocation of the Free Space
Step 4
After you have allocated the free space in the next window you have to specify the partition size you are creating then click Next as shown in Image 4.
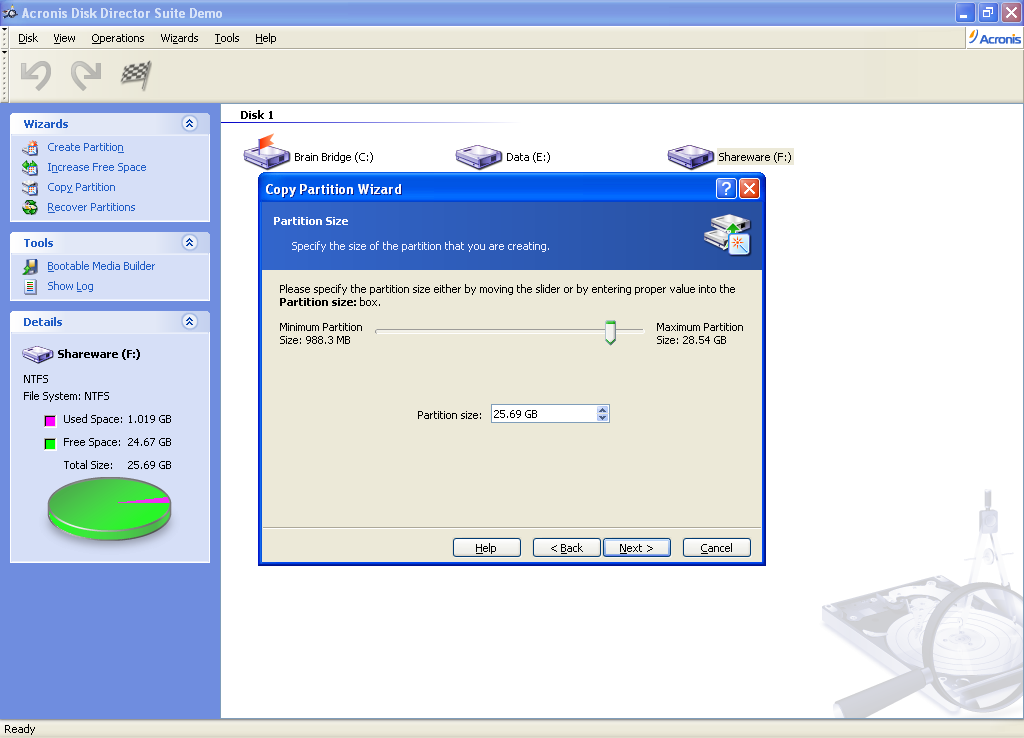
Image 4 - Specifying the Partition Size
Step 5
After the partition size is been specified in next window you have to specify the type of partition. There are three types available.
Normal (Computer Boots from this partition it can contain Data and OS Files).
Primary (Computer can boot from this partition but Boot Manager must be present it can contain Data and OS Files).
Logical (This partition is used in case you are going to handle only the data files) after selecting the type of partition click on Next (ReferImage 5).
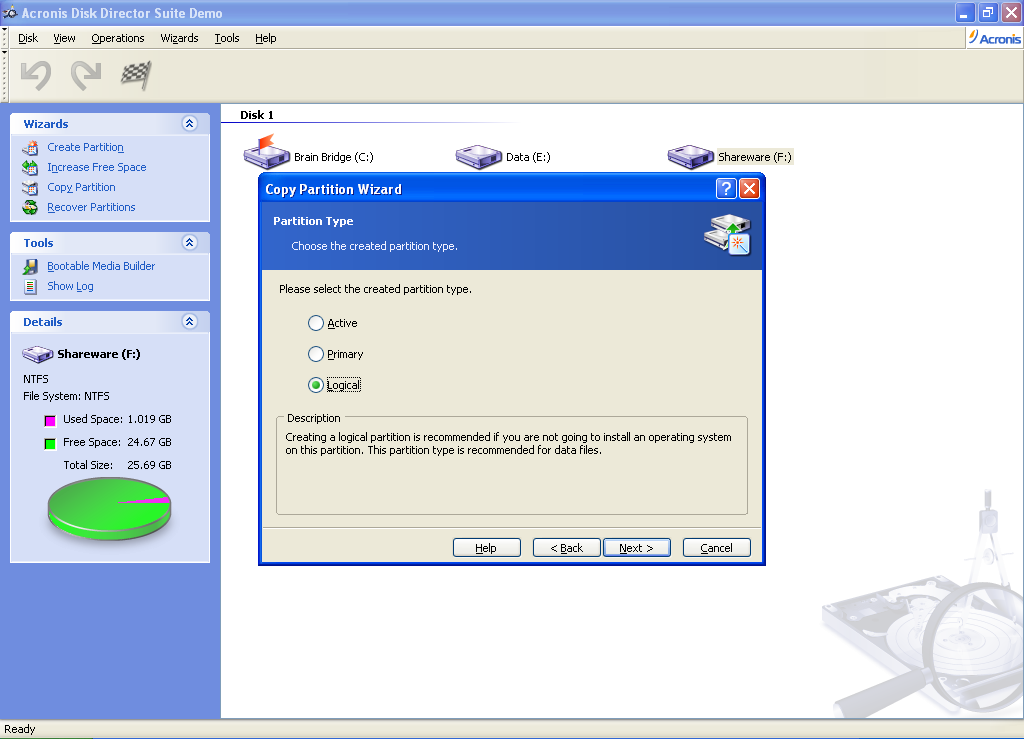
Image 5 - Selection the Partition Type
Step 6
After the partition type is selected the file system for the partition is to be selected in next window after selection of the file system type click Next to copy/backup of your partition.
Step 7
After selection of Partition File system then comes the labeling part in the next window you can assign a letter to the Copy of Partition then click Next. In the next window you can name your Copy of Partition as you want then click Next.
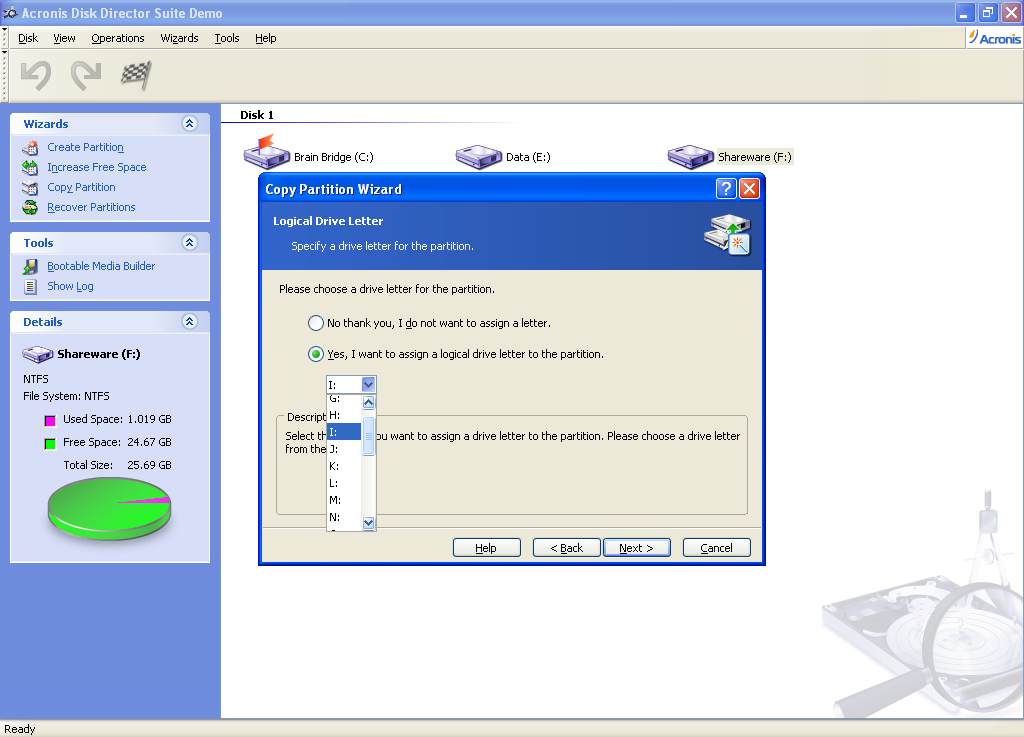
Image 6 - Assigning an Alphabet to the Copy of Partition
Next window will show your partition structure as shown in Image 7 and then click Finish button.
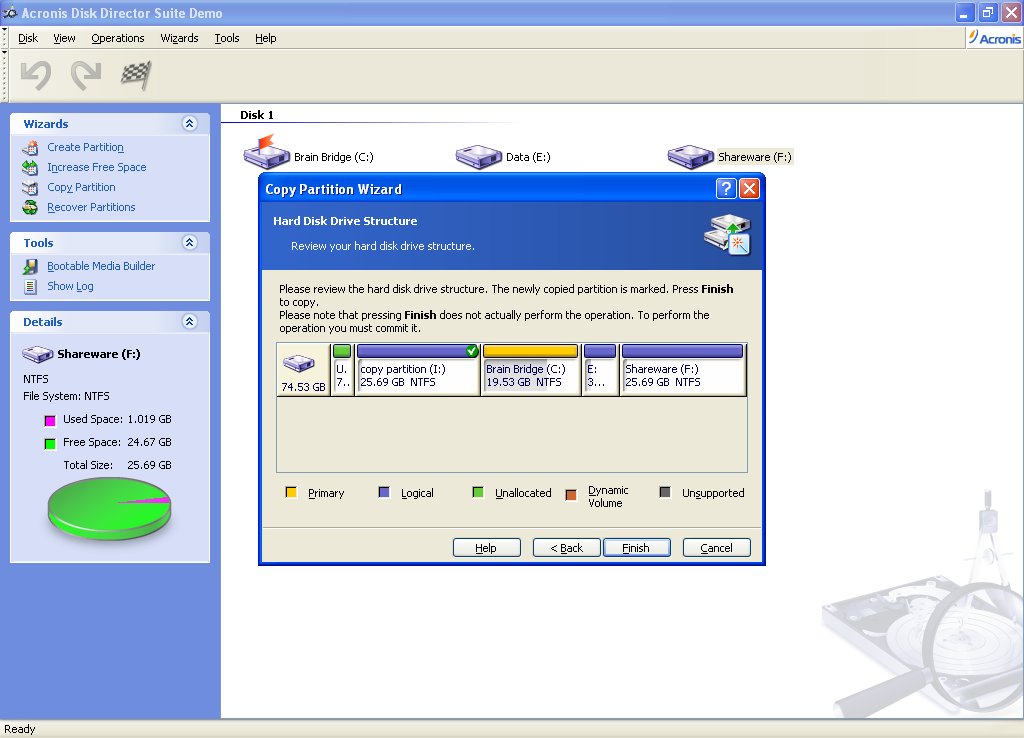
Image 7 - Hard Disc Structure after the Copy of the partition is created
Step 8
After clicking finish your Copy of Partition will get created as shown (Encircled Black) in Image 8.
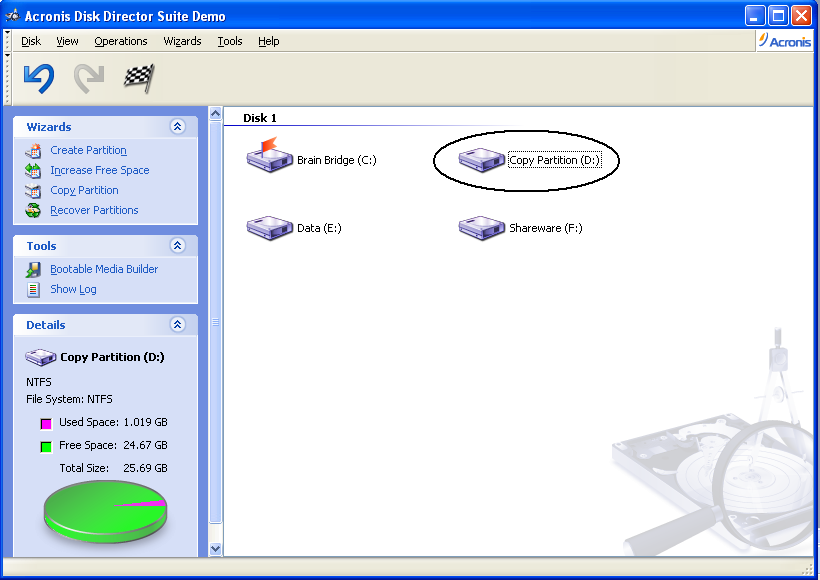
Image 8 - Copy of Partition created
Created partition copy can be used as a backup, in transferring the data from one disc to another. In this way Acronis Disk Director had partition data back up very simple and user friendly.