Quick Backup With SyncBackSE
There are several utility softwares available in today’s market, selecting perfect software out of these, matching your requirements is a mind-numbing process. SyncBackSE is a simple to use program with powerful features. You can create a backup in few minutes by following these backup steps. This is ‘one-click utility software’ trusted by Organizations, Universities, Schools, Institutions, Health Care Industries and several Individuals.
System Requirements
Windows Vista, Windows XP, Windows 2003, and Windows 2000.
First of all users have to download the freeware software version from SyncbackSE
Install it into your system and run the application from icon on your desktop.
Step to Backup Data
1. Create the Profile. Click the "New" button located on the lower left of the program window to create your profile. Choose profile name, Select the backup option to copy files to another directory, drives, FTP servers etc. click ‘Next >’ to proceed as shown in screenshot 1.

Screenshot 1: Click on backup to start backup operation
Select FTP option if you have to use FTP for your back up process. Now, select the Zip option if you want to zip your backup files. Select the Source and Destination. Understand the 'Source' and ‘Destination’ to make backup process simple where ‘Source’ is a particular location from where users want to backup the files or folder or drives. And the 'Destination' is a different location to where you want to store your backup data. Now select the Backup operation and Click the "Done" button to complete the profile.
2. Select the profile to backup data by clicking on Run button, Progressing window will pop up to start with backup data as shown in the screenshot 2
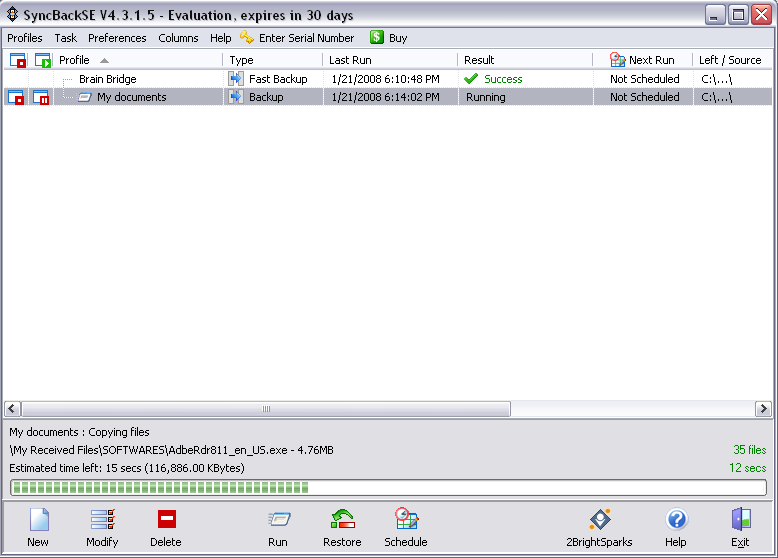
Screenshot 2: Evaluation of Backup Profile
3. The ‘Differences Window’ shows the action that will be taken on the files, whether they will be copied, deleted, or moved (refer screenshot 3).
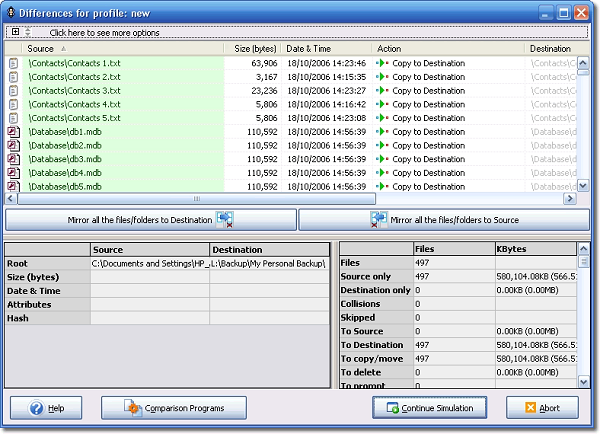
Screenshot 3: Differences for Profiles
How to Restore your Backup files
Select the ‘Restore’ option to start with restore process:
During your restore process you have to carefully opt for the three steps discussed below:
a. In the first step you have to select ‘Yes’ to replace your older files with new ones or ‘No’ if you want to skip it.
b. In your second step you have to select ‘Yes’ to select the specific directory to restore to ‘source’ else select ‘No’ to skip this process.
c. In your third step you have to select ‘Yes’ to select the specific directory to restore from ‘destination’ else select ‘No’ to skip this process.
Now ‘Difference Window’ will open, click continue to restore your files (refer screenshot 4).
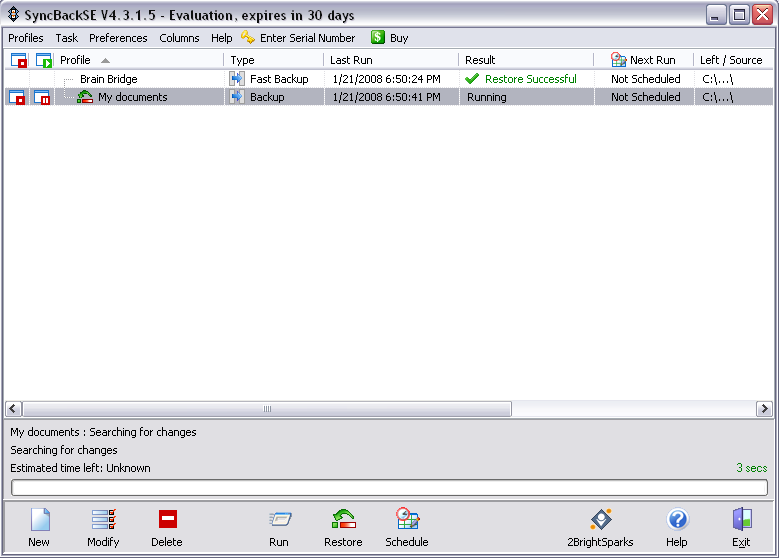
Screenshot 4: Restore Process
This is user friendly software and is suitable for beginners as well as for advanced users. Users can explore various advantages with this software like backup, restore, and synchronization process.