NovaBACKUP 8.0 is a reliable and cost-effective data backup and protection software solution for home and small business users. NovaBACKUP 8.0 is software designed by NovaStor, specially created for taking the backup of our data. NovaBACKUP 8.0 comes with features such as virus scanner; it can create an image file of your hard drive which is bootable. Taking the system backup is very simple process and the interface provided for this software had made it user friendly too. The Step-by-Step Wizard guides you through performing backup and restoration procedures. Set the scheduling and forget it functionality.
System Requirements for NovaBACKUP 8.0
- CPU Pentium processor or further
- RAM : 64 MB
- Hard Drive Space of 15 MB
- IE 6.0 or further
Backup with NovaBACKUP 8.0
Run this program to your computer and open the application to protect your data. In the opening window of NovaBACKUP 8.0, select Backup optionas shown in Figure below;
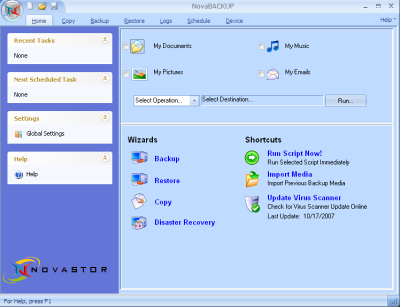
Figure 1 - Opening Window
Step 1: Items Selection
AfterBackup wizard gets open, select the items that you want to backup, suggest backup Job script and now click to Next, as shown in Fig.2;
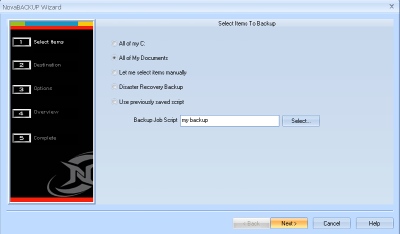
Figure 2 – Items selection Window
Step 2: Destination and Backup Types Selection
Signify backup files name, select the Backup Destination where you should keep the backup file, and finally select backup types(To know more about backup types refer my previous article ) and click Next as shown in Fig.3;
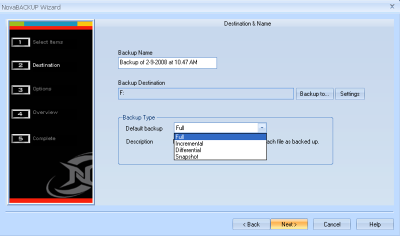
Figure 3 – Destination Selection Window
Step 3: Backup Options
Select the options such as Compression, Data verification, virus Scanning etc. to be performed on the backup data before and after backup operation.
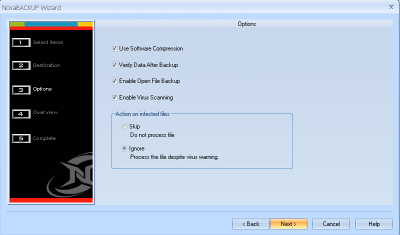
Figure 4 – Backup Options
Step 4: Backup Settings Overview
This window will display all the setting that you have selected before and give overview of your backup settings.
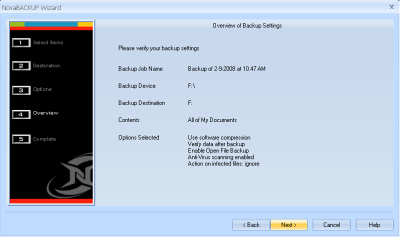
Figure 5 - Backup Overview Window
Step 5: Backup completion
In this wizard, select your backup and save files preference and click Finish button to start backing up your files. You can view the process progress window shown in Fig.6;
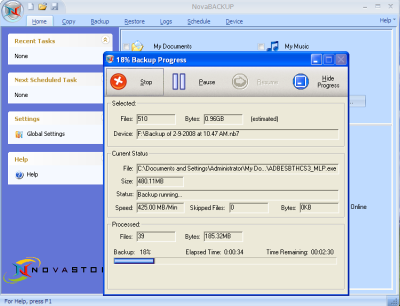
Figure 6 - Backup Progress Window
Another simplest way for Advances users, you need to select the backup tab and select possible backup options to start with backup as shown figure 7. And the same case is possible in case of the restoring files as shown in figure 11.
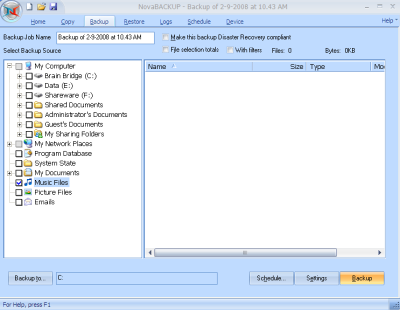
Figure 7 – Backup All-In-One Window
Restoring the Backed Up files
If you loss your data in any circumstances, you have to select the Restore option to restore it back as shown in figure 1.
Step 1: Source Selection
In this wizard, you have to select your backed up files from CD/DVD-drive, Local or network drive, from where you can store your original data back to your system.
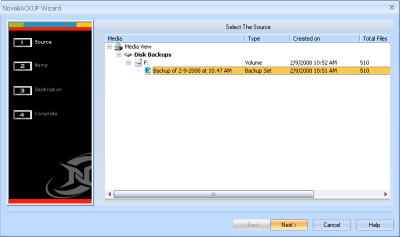
Figure 8 – Source Selection option
Step 2: Select Items and Destination to Restore
You have to select the items you want to restore. In the Preceding Destination selection window, you have to select overwrite options to restore a files that already exists on your computer and restore files to original or alternate location.
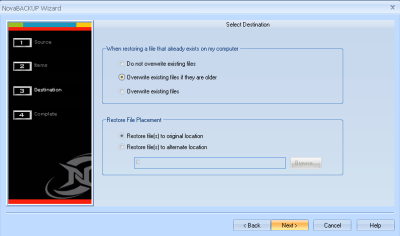
Figure 9 – Destination selection Wizard
Restoration progress window will pop up and showing your restoring procedure. You will get all your data back after 100% completion of this progress of restoring files.
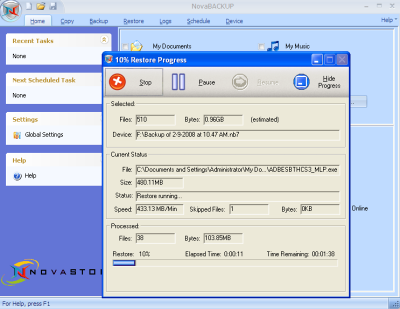
Figure 10 - Backup Progress Window
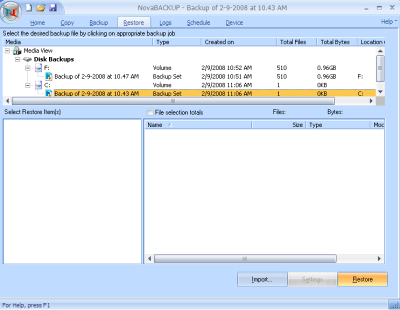
Figure 11 – Restoration - All-In-One Window
Mirror and Copy features provide a simple method for mirroring or twinning files and directories in native format. Disaster recovery will helps you to recover your data fast when the worst happens and the robust scheduling lets you set automatic backups.