How to take backup using Retrospect?
Retrospect is very user friendly and also versatile software for taking the backup of your data. In this software there is no need for the complex scheme of media rotation. This software takes back up to many data storage devices along with the system itself. The data storage devices comprise of CD/DVD, DX155 removable system, NAS appliances. This software can run on WINDOWS and on MAC OS system also.
System Requirements for Retrospect
- PENTIUM Processor PC with a speed of 1 GHz or higher.
- WINDOWS XP/98/VISTA/2003 MAC OS
- RAM 128 MB
- Hard Drive space of 25 MB
Taking backup using Retrospect
In the opening window click the command button Backup, in the Backup overview wizard click Backup command button. In Backup Wizard click Next, shown in Fig.1;
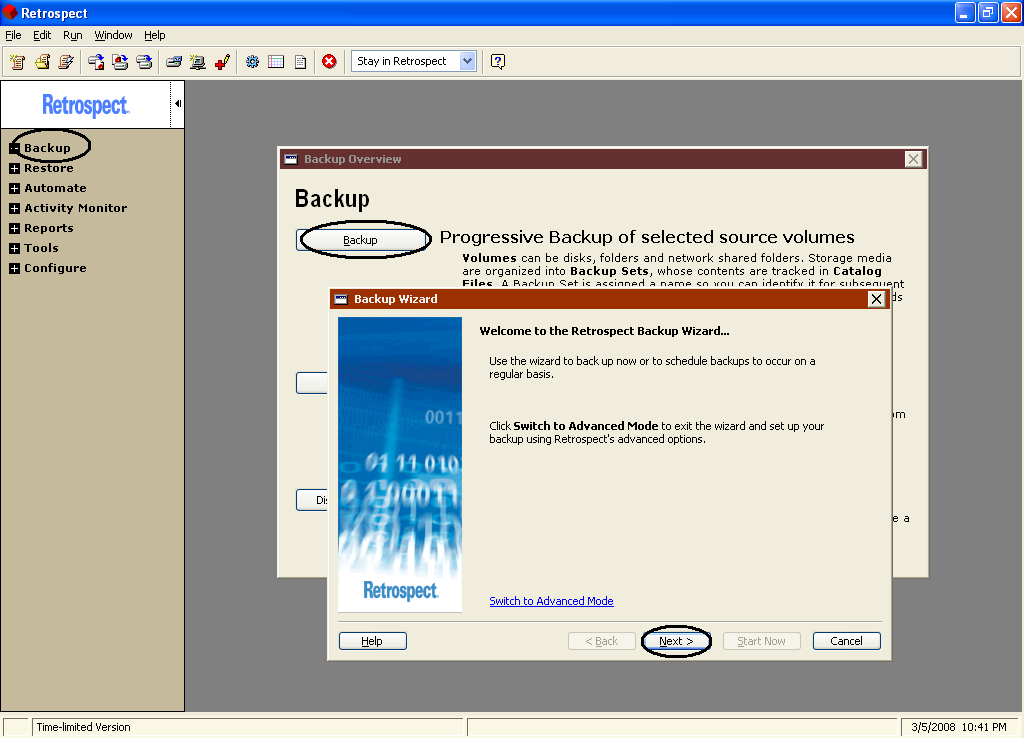
Figure.1 Opening the Backup Wizard
In the next wizard window you have to select the destination from where to backup, as shown in Fig.2;

Figure.2 Selecting the Data Type
In the next window you have to select the type of data from the files to, be backed up. As shown in Fig.3;

Figure.3 Selecting the Type of Files
In the next window you have to select the destination where the backup files should be stored, as shown in Fig.4;
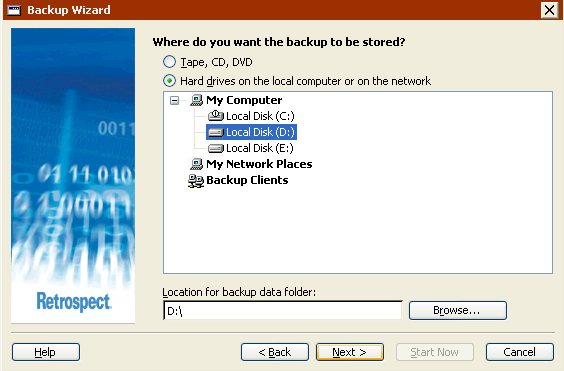
Figure.4 Destination Selection Window
Then comes the scheduling part, here you have to select the time for backing up the data, as shown in Fig.5;
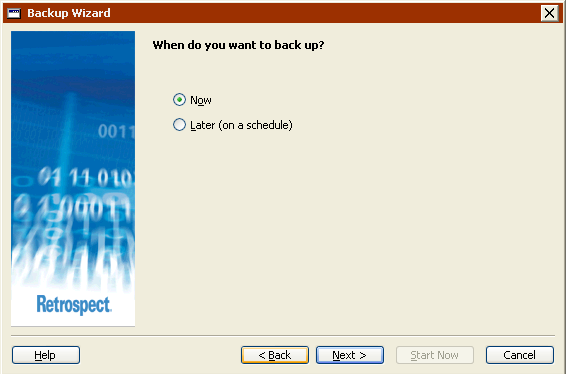
Figure.5 Scheduling Window
Then comes the naming part, here you have to name the backup file; you can name it as per your convenience. Either you can name it data wise or your own name, as shown in Fig.6;

Figure.6 Naming the Backup File
Then if you want to compress the data you can select it in the window as shown in Fig.7 below;
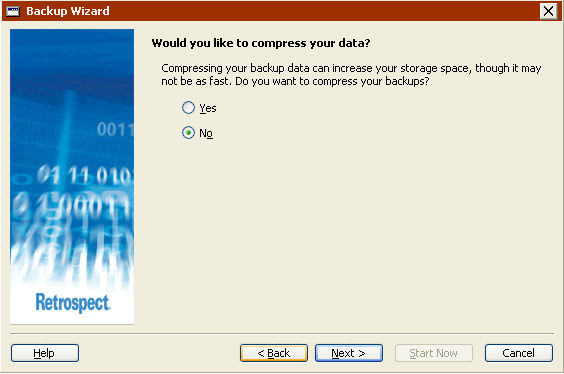
Figure.7 Compression of Data
After you click Next the backup process starts, and the progress bar is shown to you as shown in Fig.8 below;

Figure.8 Progress Bar
Restoring your Data using Retrospect
For opening the Restore wizard, click the Restore command button in Fig.1 window and then again Restore then Next the window shown in Fig.9 will appear;

Figure.9 Restore Wizard
Then you will see the list of all the backup files, select the files and click Next as shown in Fig.10;
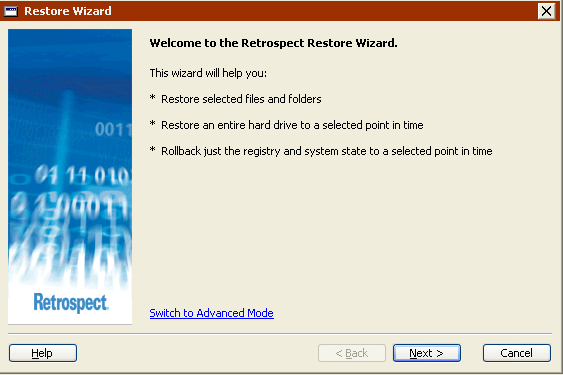
Figure.10 Restore Set Selection
Then you have to select the destination where your back file is stored, and click Next as shown in Fig.11;
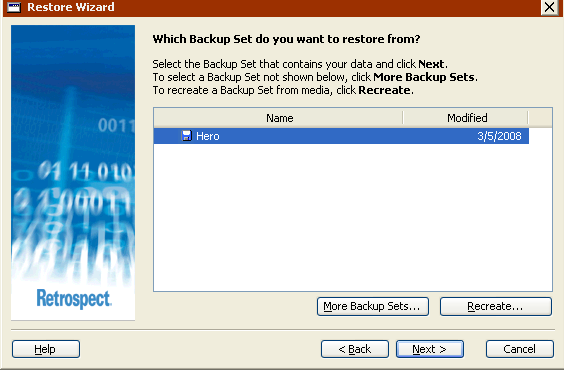
Figure.11 Destination Selection for Backup Files
Then come’s the location selection where you have to restore the files. Select one of the options shown in Fig.12 and click Next;
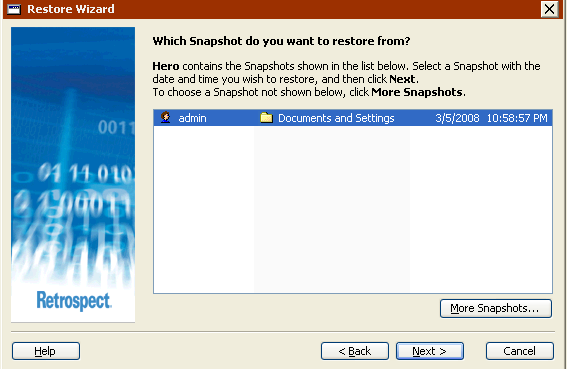
Figure.12 Location Selection for Restoring
Then come the type of restore you have to select as shown in Fig.13;
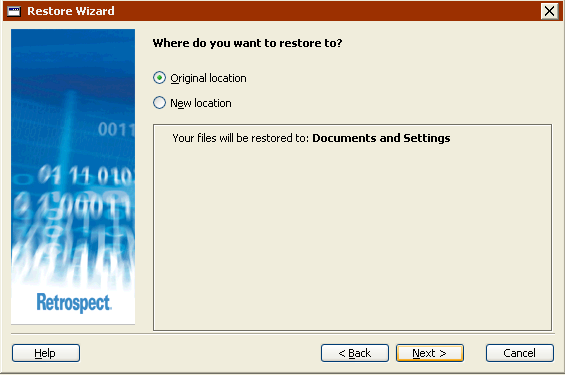
Figure.13 Restore Type Selection
When you click the Next button then you can see the backup files. You have to select the files by checking the check boxes provided and click Ok as shown in Fig.14. Then in the next window you have the option of replacement of the restored files select the wanted option and click Next as shown in Fig.15. In the next window you have click Finish, all the files will be restored to the location you selected as shown in Fig.16.
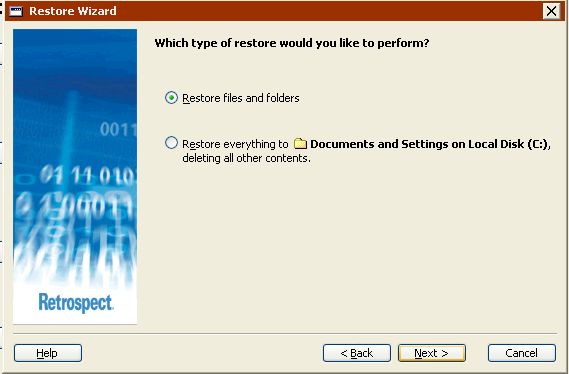
Figure.14 Files Selection for Restoring
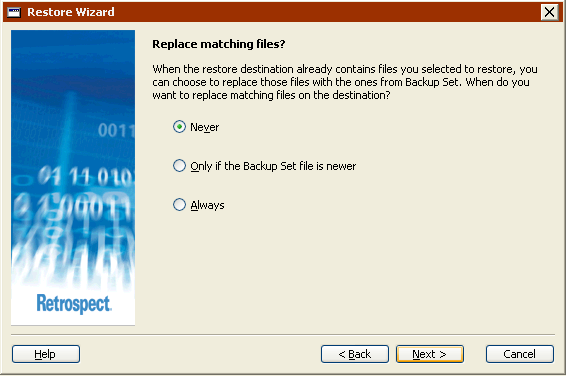
Figure.15 Replacement of Restored Files
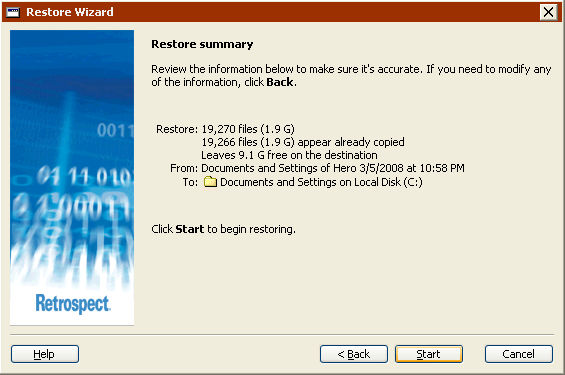
Figure.16 Restore Summary
Retrospect backup procedure is quiet long and time consuming. But security of backup data is ensured. The procedure is long but the interface provided is quiet user friendly.