How to take data backup using Casper 4.0?
Casper 4.0 provides support for Windows Vista. This software is implemented with SmartWrite and SmartClone technology. Performance enhancement, input and output cancellation, multi boot configuration are some of the main features. The VISTA support is provided to both of its version 64bit and 32bit. These two technologies SmartClone and SmartWrite provide us speedy recovery of the damaged system.
System Requirements of Casper 4.0
- IBM or Pentium compatible PC with a processor speed greater than 800MHz
- Hard Drive Space of 8 MB.
- RAM 64MB
Features of Casper 4.0
- Provides support for input/output cancellation in VISTA
- Provides support for multi bootable configuration.
- Gives us event log which is administrative.
- New OEM partition is also supported.
Taking backup using Casper 4.0
The interface provided is also very user friendly. Just you take the mouse pointer on the option you want to select, and the software highlight its function as shown in window in Fig.1 below.
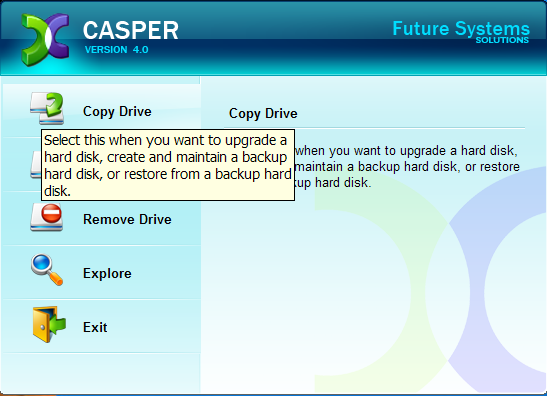
Figure.1 Opening Window Option Selection
When you select the copy drive option, then the copy drive wizard starts. In the wizard first you have to select the copy method. There are two options given, select the option as per your requirement. The option selection window is shown in Fig.2 below;
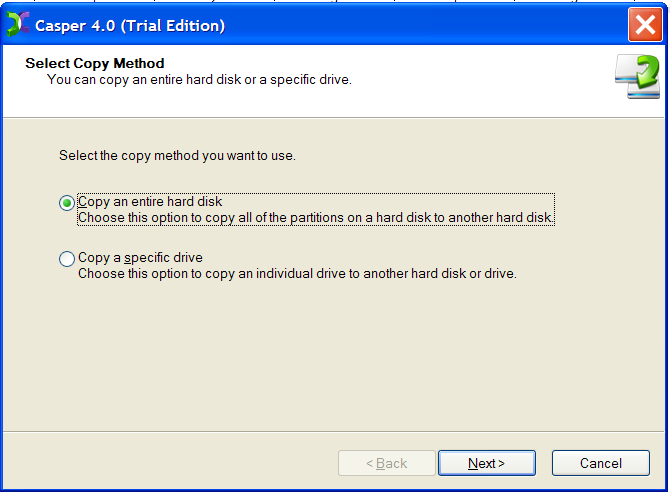
Figure.2 Copy Method Option Selection Window
After you select the copy method then the software searches the available drive on your computer. And the list is displayed as shown in window below in Fig.3. The list below contains the target selection only i.e. the drive of which you want to take backup of;
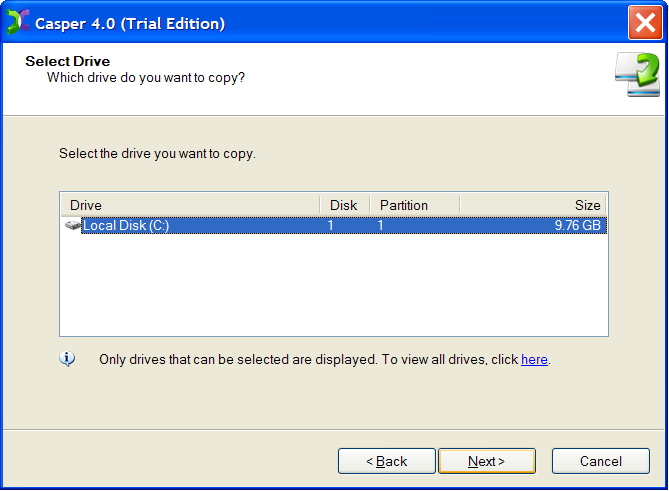
Figure.3 Choosing the Target Drive
In the next window you have to select the destination drive where the image file of the selected target file will be made. The window is shown in Fig.4 below.
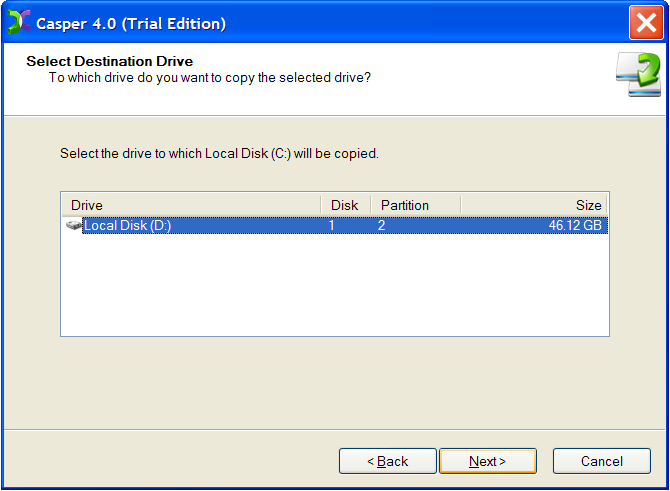
Figure.4 Target Drive Selection Window
After the destination drive is selected you have to click the Next command button and the copying of the target drive will be started to the destination drive and a progress bar will be visible to you.
By reading the above procedure we come to a conclusion that Casper 4.0 has provided us with a very good user interface which is mostly helpful to the beginners who has just become familiar with the backup process.