How to backup the registry
Windows Registry is a unique feature to windows and is the most important part of the windows operating system. It is a kind of a database which is used to keep settings, options and configurations for all applications, user accounts preferences, hardware configurations, the operating system related important configurations, etc. Whenever the user makes changes in the Control Panel settings, or to the file associations or to any of the system policies, or install/uninstall softwares the configurations are stored in the windows registry.
It is very important for you to keep a back up of the windows registry, especially if you install/uninstall softwares regularly or you have a habit of making changes in the registry.
Taking backup
Windows Vista
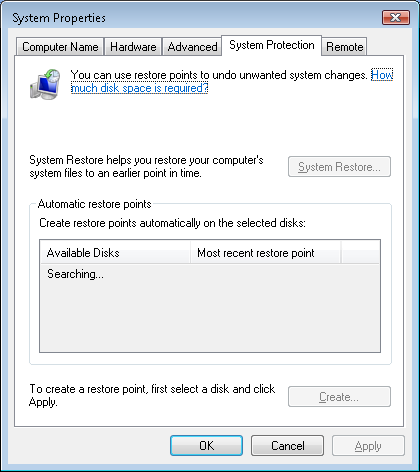
Click on the Start button, and in the Start Search box type and search for systempropertiesprotection. When it is found click on it, and if Windows prompts you for confirmation since it will be using administrative privileges, click continue.
In the System Properties dialog box go to the System Protection tab and click on the Create button to create a new restore point. Type in a name you want to give to the new restore point anything that you would want to logically name it so that it is easy for you to identify the one created by you. After that when the restore point has been successfully created press OK twice.
Creating a restore point automatically backs up all the registry information.
Windows XP
Click on the Start button, click on Run and type in %SystemRoot%\system32\restore\rstrui.exe and press enter. You will be presented with a Welcome to System Restore dialog box, there click on Create a restore point and then click on Next. In the Create a Restore Point page type in a logical name you wish to give to it that would help you identify it and then click on Create. Once the restore point has been created, then click on Close.
Restoring the registry
Windows Vista
Click on the Start button and in the Start Search box type systempropertiesprotection and press enter. Once found click on it and if the system prompts you for confirmation to give administrative privileges to the application click on continue. In the System Properties dialog box navigate to the System Protection tab and click on System Restore.
In the System Restore dialog box select the Choose a different restore point option and then click Next. Select the restore point you wish to choose that you will restore and then click on Next. Then confirm the restore point and click Finish, system restore then restores to the selected restore point’s Windows Vista Configuration and then restarts the computer.
After the computer has restarted log in to your computer and click OK in the System Restore Confirmation dialog box that will appear.
Windows XP
Click on the Start button and click on Run, then type in %SystemRoot%\system32\restore\rstrui.exe and press enter. You will see the Welcome to System Restore dialog box, there click on the Restore my computer to an earlier time option and then click on Next. Then in the Select a Restore Point dialog box select the system checkpoint.
From the On this list select the restore point section click on Guided Help (Registry Backup) option and click Next. Click OK if a message appears. Then click Next in the Confirm Restore Point Selection dialog box. System Restore will then restore the Windows XP configuration to the selected restore point and then restart the computer.
Once the computer restarts, log in to the computer and click OK on the System Restore Confirmation dialog box.